
How to Select the Right Capping Machine for Different Bottle Types
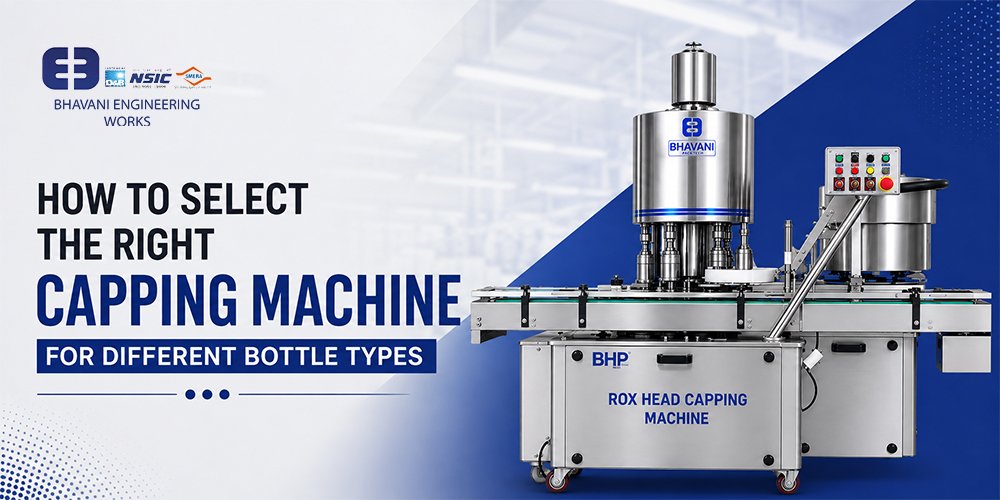
Learn how to choose the right capping machine for different bottle types, cap styles, production speeds and packaging requirements.
Introduction
- Overview of capping technology
Capping heads seal containers by applying caps with controlled torque and precise alignment. Modern systems integrate feeding, alignment, and torque regulation to deliver a reliable, sanitary seal while minimizing leaks and contamination. You can choose from semi-automatic and automatic bottle cappers, with varying levels of precision and throughput.
Key capabilities to evaluate include:
- Torque control for consistent sealing
- Alignment systems that prevent cap misalignment and rejects
- Interchangeable parts to accommodate different cap sizes and bottle shapes
- Accessible maintenance and spare parts to minimize downtime
A liquid filling machine often pairs with capping lines to create a compact, single-vendor solution from feeding to sealed containers, reducing integration risk and accelerating commissioning. Engineers have long supported plant-wide automation integration, delivering robust PLC control and HMI interfaces that streamline capping line synchronization and diagnostics. PD A JPST
Cap shapes influence the alignment strategy and head geometry; screw, snap, cork, and others demand tailored guidance to ensure reliable seating across bottle finishes.
- Vertical Chuck Capper for Tall, Narrow-Neck Bottles
Suitability for slim containers
A vertical Chuck capper provides cap guidance from above, which minimizes side loads on tall, narrow-neck bottles. This approach helps preserve neck integrity for glass and plastic containers during sealing.
Key fit considerations include:
- Cap types compatible with vertical feeding and alignment
- Minimum neck diameter and bottle height ranges
- Clearance between the capper head and nearby equipment
Practical example: A cosmetics line standardized on 30 ml and 50 ml tall glass bottles, achieving reduced cap skew during high-speed runs with a vertical chuck capper.
Critical features to monitor:
- Torque control stability to prevent under or over-tightening
- Feedback sensors that verify cap seating before the bottle exits
- Ease of changeover when bottle necks or cap sizes shift
Best practice steps:
- Document cap neck dimensions and run a short pilot for each new SKU
- Calibrate torque in small increments and record acceptable ranges
- Implement a pre-feed alignment check to catch misfeeds before cap torque
- Spindle Capper for Wide-Moped and Flanged Caps
Cap compatibility and sealing reliability
A spindle capper uses a friction-driven head designed to handle wide-moped and flanged caps with precise torque control. This approach provides consistent seating across varying flange profiles, delivering reliable seals on more complex cap geometries.
Key considerations include:
- Cap types supported by the spindle head, including wide-moped and flanged formats
- Alignment accuracy to ensure even seating across all bottles
- Seating verification mechanisms to detect misloads before exit
Maintenance considerations for high-torque applications
High-torque use requires proactive upkeep to keep performance stable and minimize downtime. Plan routine checks for bearings, spindle wear, and belt tensions to sustain torque precision.
Maintenance priorities:
- Scheduled lubrication and bearing replacement intervals
- Torque monitor calibration to maintain target values
- Access to spare parts and quick-change components to minimize downtime
- Snap-Capper for Press-On Caps on Simple Container Geometries
A snap-capper excels on straightforward bottle geometries where press-on caps can seat quickly without complex manipulation. It aligns caps and applies a uniform squeeze to achieve a reliable seal while keeping cycle times low. This approach is well suited for high-volume lines with consistent container shapes. For example, a line running standard 500ml beverage bottles can maintain a tear-free seal across 1200 units per hour with minimal cap waste.
Best practices for quick changeovers
To minimize downtime between formats, plan changeovers with a documented, repeatable sequence. Focus on alignment checks, cap feed adjustments, and pressure settings that suit each cap style. Maintain organized tool kits and labeled parts to speed transitions. In practice, run a 15-minute pre-changeover checklist and designate a single point of contact for cap lot changes.
- Prepare cap chutes and guides for the new closure diameter
- Verify cap seating using a lightweight torque cue to avoid over-torquing
- Pre-stage sensors and actuators for the incoming container geometry
Utilize quick-change components where available and ensure operators validate a sample run before resuming full production. Documentation should capture the exact steps and any deviations observed during the changeover. Record cycle time impacts and any cap seating anomalies to inform future changeovers.
Limitations with complex bottle shapes
Snap-cappers struggle when bottles feature irregular shoulders, tall necks, or nonuniform bottom profiles. Misfeeds and mis-seated caps increase the risk of leaks or contamination in these cases. In such scenarios, a more adaptable capper or a modular setup may be required to preserve product quality. Consider conducting a geometric audit of each new SKU to anticipate those edge cases before line commissioning.
- Increased risk of cap misalignment on irregular geometries
- Limited compatibility with certain cap types beyond simple press-Ons
- Potential for higher downtime if frequent shape changes occur
- Monoblock Systems for Small-Cap Applications
When to deploy monoblock configurations
Monoblock systems integrate feeding, capping, and discharge in a compact unit. They are especially effective when cap sizes are small and container geometries are simple. This setup minimizes moving parts and reduces footprint on crowded lines. Consider monoblocks when rapid changeover and space efficiency are top priorities.
Key indicators for deployment:
- Limited floor space or tight plant layouts
- High-volume, small-cap operations with consistent bottle shapes
- Need for fast line adoption in multi-product runs
Integration with star wheel and bottle handling
Monoblock designs synchronize with star wheel systems to manage bottle spacing and orientation at intake. This tight integration improves cap alignment and reduces skew that could cause leaks. The unified setup also simplifies maintenance and inspection routines.
Practical considerations include:
- Coordinated timing between feed, capper, and discharge to maintain throughput
- Accessibility for routine adjustments and part replacements
- Availability of compatible spare parts for quick repairs
Real-world deployment scenarios
On a beverage line using 28 mm caps at about 2,000 bottles per hour, a monoblock can shorten line lengths and speed up changeovers, delivering consistent seals across a stable SKU mix. For essential oils requiring strict torque control, a monoblock with an integrated torque-sensing capper can maintain seal integrity across multiple SKUs with minimal variation.
Practical steps to implement successfully
Audit the line to identify bottlenecks before selecting a monoblock. Run a pilot with a staged product mix to validate throughput and changeover timing. Train operators on the integrated components and prepare a spare parts kit tailored to the chosen monoblock model.
| Aspect | Monoblock Benefits | Potential Trade-offs |
| Footprint | Compact, space-saving | Limited expansion options |
| Changeover | Faster due to integrated design | Component specificity can limit versatility |
| Maintenance | Fewer connections to monitor | Shared wear requires coordinated upkeep |
- Multi-Format Capper with Quick-Changeover Capabilities
Handling multiple bottle sizes and cap types
A multi-format capper adapts to a range of bottle diameters, heights, and cap styles without extensive retooling. This flexibility helps maintain steady throughput when your line switches formats. For example, a plant transitioning from 30 mm to 38 mm necks can keep using the same capper with only minor feed-path adjustments.
Key capabilities to verify:
- Auto-detect and sequence correction to align caps with varying neck finishes
- Modular feed paths that accommodate different bottle geometries
- Compatibility with common cap types such as screw caps, snap-on caps, and cork closures
Tool-free adjustments and validation procedures
Tool-free adjustments speed up format changes and reduce operator error. Interfaces should allow quick diameter and height tweaks, cap-per-pin spacing, and torque targets without tools. Validation procedures confirm proper seal integrity after each changeover. For example, after swapping to a larger cap, run a small validation batch and verify torque readings against the preset tolerance.
Recommended practices:
- Documented quick-change sequence with step-by-step checks
- Visual and sensor-based validation to confirm cap seating and alignment
- Pre-loaded presets for common formats to shorten setup time.
| Feature | Benefit | Considerations |
| Format versatility | Handles multiple bottle sizes and cap types | Ensure alignment system supports all neck finishes |
| Changeover speed | Reduced downtime between formats | Keep spare parts and presets ready |
| Validation | Verified seal integrity after changes | Incorporate automated torque checks |
- Fully Integrated Line Capper with Line Synchronization
Interfacing with fillers, labelers, and conveyors
A fully integrated line capper coordinates with upstream fillers and downstream labelers to maintain consistent timing and spacing. The aim is to minimize bottle handling errors and downtime from misaligned transfers. A robust interface uses standardized signals for start and stop, jam detection, and auto-synchronization to line pace.
Key integration considerations include:
- Communication protocols that support real time status sharing
- Aligned conveyor timing to prevent throughput bottlenecks
- Common mounting standards for quick mechanical integration
Automation levels and scalability considerations
Automation ranges from semi-automated to fully guarded robotic integration. A scalable system allows adding formats, more heads, or enhanced torque monitoring without reworking the line. The capper should adapt to future product changes while preserving seal integrity.
Important scalability factors:
- Modular head configurations to add or remove capper heads
- Torque control expansion to support new cap types
- Software upgradability for control logic and diagnostics
For precise torque oversight, many lines integrate the KC-15 torque monitor to track actual vs. target torque in real time, helping reduce leaks and improve seal consistency across formats.
| Aspect | Impact on Performance | Considerations |
| Line synchronization | Smooth throughput and reduced jams | Require compatible sensors and control bus |
| Format scalability | Accommodates more products without line redesign | Plan for future cap styles and neck finishes |
| Diagnostics | Faster downtime resolution | Accessible remote monitoring and fault logging |
Conclusion
Choosing the right bottle capping solution starts with your product profile. Consider cap type, bottle geometry, and required line speed before narrowing to a machine family.
Key takeaways to guide your decision:
- Match capper to cap and bottle compatibility to avoid rework and downtime.
- Prioritize precision tools like torque control and alignment systems to protect product quality.
- Assess changeover efficiency and maintenance access to maximize uptime and ROI.
- Evaluate supplier support and spare parts availability to sustain long term performance.
Practical steps you can take now
- Request a cap and bottle compatibility matrix from the vendor and test with your actual products during a pilot run.
- Specify torque tolerance, peak closing speed, and capping head geometry to match your cap style and bottle neck finish.
- Plan changeover with standardized tooling, labeled wrenches, and a documented sequence to reduce downtime by at least 20%.
- Confirm lead times for critical spares and establish a service window with the supplier for routine maintenance.
For scalable growth, start with a modular, integrable system that can evolve with your line. A well-chosen capper reduces leaks, contamination risks, and variability, while delivering consistent results across formats.
Always validate the final selection against your plant’s throughput targets and maintenance capabilities to ensure sustained production efficiency and reliability.
| Question | Guidance | Notes |
| Torque control | Set targets per cap type; monitor actively | Critical for product quality |
| Changeover time | Prefer tool-free adjustments and presets | Minimizes downtime |
| Maintenance | Schedule regular checks of bushings, gears, and sensors | Prevents unexpected failures |
FAQ
You may have questions about selecting and using a capper. This section provides concise answers focused on practical considerations you can apply today, with real world context.
- What factors determine the right capper for my line? Bottle size and shape, cap type, required speed, and automation level drive the choice. For example, an inline glass bottle with a twist cap needs different torque profiles than a PET bottle with a snap-on lid. Ensure robust alignment systems to prevent cross-threading and seal failures.
- How important is torque monitoring? It helps ensure consistent sealing and reduces leaks or contamination. Use a system that stores target torque per cap type and logs real time feedback. Set alarms for out of tolerance values and review trend data to catch wear before it affects quality.
- Can I switch cap types without a full retool? Some multi-format or quick-changeover systems support rapid format changes. Look for tool-free adjustments, clearly labeled presets, and validated change procedures tested during downtime windows.
- What about maintenance and downtime? Choose a design with modular components and easy access to wear parts. Schedule spare parts stocking based on uptime, and perform regular calibrations on sensors and clutches to minimize unplanned downtime.
- How do I measure ROI? Compare production efficiency gains, reduced rejects, and extended parts life. Track monthly OEE improvements and perform a 12-month total cost of ownership analysis, including energy use and maintenance labor.
- Is integration with other line equipment necessary? Fully integrated lines reduce handling steps and timing discrepancies. Confirm interfaces with fillers, labelers, and conveyors, and verify data networking for centralized monitoring and traceability.
Category